Introduction
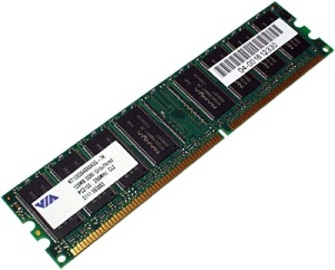
Dimm stands for dual inline memory module. Dual inline memory module comprises of dynamic random access memory integrated circuit. It differs in the number of memory components attached to a circuit that is printed. There are lots of golden pins present on the front and back side of the dual inline memory module.
Step 1
If you count these pins from both sides, you will get the figure of 184 pins. 94 on front and 94 pins on back side. Dual inline memory module is usually used in desktop computers and there are four types of it.
• 100 pin DIMM
• 168 pin DIMM
• 184 pin DIMM
• 240 pin DIMM
Step 2
These are four types of DIMM memory but they all have different features and qualities. 100 pin DIMM is commonly used for SDRAM, 168 pin DIMM for SDR SDRAM, 186 pin DIMM for DDR SDRAM and at the last DIMM 240 pin memory is used for protected DRAM. DIMM 240 pin memory has the options to upgrade it and to increase its speed also. It also has the power to increase the speed, density and reliability of memory systems. DIMM 240 pin memory is different and better from other DIMM memories because it has the ability to increase its speed, consistency and concentration of memory also. DIMM 240 pin memory is normally used to get high speed to work on any data.
Step 3
DIMM 240 pin memory provides additional memory to your computer like if it is working slow of freezing; you can easily upgrade the memory to get faster speed. You will be than free to open multi tasks and also many other heavy programs. DIMM 240 pin memory is relatively of low prices and you also have the opportunity to extend the memory up to your desired levels.
Step 4
Installing a DIMM 240 pin memory is not a big deal, you can easily do it at home but if you have some knowledge. You can also take help from different websites especially YouTube to get the visuals of installing a DIMM 240 pin memory. You can install DIMM 240 pin memory by following these steps:
Step 5
• Shutdown you PC and remove all the wires whether electric or keyboard. Lay down it on the floor or put it on any table.
Features

• Open the cover of the computer and put it aside, you can done by removing few screws.
• Now it’s the time to locate the RAM slot of your computer, you can find it easily as it will be in front of you after removing the cover.
Comments
• Now, remove the existing ram to replace it with the new DIMM 240 pin memory. If there is a free slot, you can install your DIMM 240 pin memory there. But if there is no free slot, you should simply loose the clips and remove the existing module.
• Now it is very simple to put DIMM 240 pin memory in the free slot. When you will place the module, clips will be automatically tie up and will hold the module. This is the simplest way to install DIMM 240 pin memory.