Introduction
So you just bought yourself a Huge bulletin board and now want to scan it for digital use. Well scanning giant size printed boards is kind of tough. The obvious solution is to get a giant scanner, like the ones in a print shop but of course it’s not always feasible. You can scan it just as well with your own scanner but it may be a little hectic and a little long but it is still possible. The method is very obvious, you have to scan each frame one by one till the entire page is scanned and ready for use. For this you will need an additional picture editing software. Paint application is not feasible here so I recommend you to use Adobe PhotoShop or Microsoft Picture Manger. They will also help you enhance quality of the scanned printed boards later on.
Step 1
First download what ever picture editing application you wish to be using. You will need it to paste all the frames together on one canvas and make it look like one picture. If you already have an application for this then make sure it is properly working as this will be the main thing you need for your printed boards.
Step 2
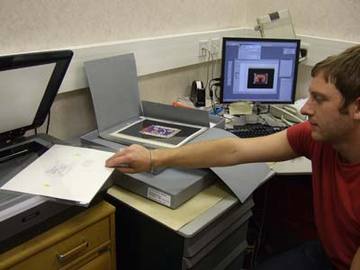
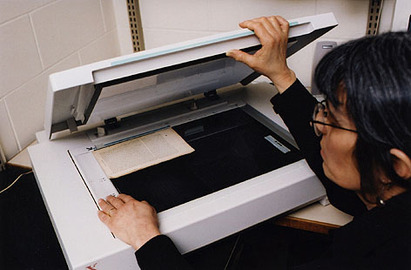
Now switch on your scanner and get it ready for the scanning process. Place one part of the bulletin board on the scanner screen and make sure that you’ve started form the corner of the printed boards. Also make sure you are within the scan screen frame. The corner of the screen is not necessarily in some scanner where the scanning begins.
Step 3
Mark what part of the printed is in the scan frame and then run the scan wizard to commence scanning. Once this is done continue to scan the next part of the printed boards just like you did before. Make sure that you scan exactly from where you marked otherwise you could loose some centimeters of the board in the scanned image. You may scan a little from inside the marked area as you can crop it out from the photo editing application.
Step 4
Once you’ve scanned all the frames and have all of the printed boards parts in a digital form in the computer open the photo editing application.
Step 5
The next few steps will be explained according to the Adobe Photo Shop. First open a new blank file in the app. Now click on “Image” in the toolbar and go to “canvas size”. Here adjust the canvas size to whatever is the size of your printed boards or more if you want to make some adjustments or add something. Then click “ok”.
Step 6
Now one by one copy the scanned files in the computer of the printed boards and paste them on to the canvas. Don’t do this all at once. Keep adjusting the images on the canvas in the order they should be. You will see that each image is coming up as layers on the canvas and the later bar on the right will individually show you each image.
Step 7
Once you’ve sorted the images in the order they should be on the canvas you should be able to see your entire bulletin board on the screen as one image. If the images are extra because you scanned some extra portions or rescanned some portions of the printed boards then you can individually crop out the corners of the image using the crop tool. Press “C” or look for the crop tool on the editing bar on the right. You can then highlight the parts of the image you want and the rest will be cut out.
Step 8
Now save the final canvas by going to the top toolbar and clicking on “file” then “save AS”. A window will open and it will ask you to type in a name for the image and where you want to save it. Make sure that where it says “Save file As” you change it from PHD to Jpeg. Then click ok.
Tips
You have now successfully scanned your printed boards or your bulletin boards and can now see your printed boards on the screen as a single image file.
Sources and Citations
hipscan.socialprintstudio.com/