Introduction
No laptop today come without a webcam, even the cheapest netbooks have a tiny VGA cam for the least. WE need it for so many reasons, Skyping with friends, chatting, takings snaps of ourselves and so much more. Hence when your laptop webcam break downs all you can do is frown and cry and hope it’s replicable. Well it is and it’s so easy you could do it yourself at home with right tools and parts and of course and expert guidance. You get the tools and we’ll give you the guidance to fixing you laptop webcam.
History
First you to disconnect any kind of power supply coming to your computer. Disconnect the power, remove the battery and keep the laptop shut down. Now you need screwdrivers. Most laptops have small screws so an ordinary tester screw driver isn’t going to be suffice. You’ll need the ones that are used to fix spectacles or just ask the hardware store the ones to fix your laptop. He’ll know what you’re talking about. So now that you have the tools, you need to start unscrewing your laptop from the bottom. You need remove the entire bottom case so remove all the screws and keep them in safe bowl or plate. Not all the screws you’ll be unscrewing will be of the same size so make sure you use separate plates or boxes to keep them from mixing up. Now you’ll see a big green mother board ad behind it the keyboard. You need to remove them so you can reach the part where you can detach the LCD screen. So carefully start unscrewing the motherboard and the wires. Keep a camcorder on so you know where everything goes and where you’re getting the wires out from. This way even if you forget you’ll know how to reassemble it back. Fixing a laptop webcam can be scary especially when you see the inside of the laptop
Features
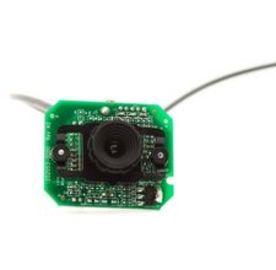
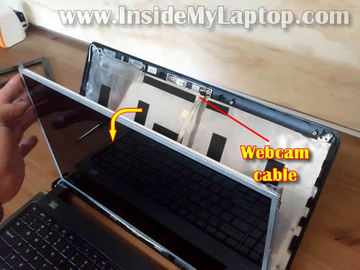
Now you’ll see some screws and a ribbon wire connecting the LCD to the motherboard. You need to disconnect and unscrew these to remove the top part of the laptop. Now that the LCD is sepearated you need to open the LCD casing. You can use a slim knife to peal the corner and then jam it open. Normally in newer laptops the laptop webcam will be right in front but for some you may have to remove some more parts. Do the unscrewing just like you did for the bottom part of the laptop. Remove the webcam and it’s wires carefully. Place the new webcam exactly the way the old one was and make sure you wired it right. You don’t want to open the laptop again and do the whole process again.
Tips and comments
Once you’ve connected the laptop webcam, start replacing all hardware and screws to reconnect the laptop. Use the webcam to back the way you came, retrace your steps one by one and don’t hurry. Any part left unscrewed or unwired can cause your laptop to malfunction. Once you’ve properly replaced the parts and screwed back the wires and connected the LCD and the motherboard take a breath. Now connect the battery and switch on the laptop to check your new laptop webcam is working. If it isn’t working retrace your steps to see if you’ve missed any wiring.