Introduction
If you want to print great photographs with your inkjet printer, there are some things to keep in mind. This article provides some steps to help you print a fantastic photo, and teaches you how to print the best inkjet printer photo you can.
Step 1
Before anything, the first step to take is to make sure that you're taking pictures with a high quality digital camera. The camera should be two to three mega pixels or more. If you aren't taking your photos without a high quality camera, you risk damaging the quality of the print. Your print could come out garbled or pixelated.
Step 2
After you've uploaded your photo onto the computer, edit it in a photo editing program such as Photoshop. Programs such as these allow you to make adjustments to the picture before you send it to your inkjet printer. Adjustments to the photo can include color, or even eliminating red-eye or a nasty pimple. Also, be sure to crop and resize if the photo needs it. Cropping almost never hurts, it can help eliminate any extra detail that isn't part of the photograph.
Step 3
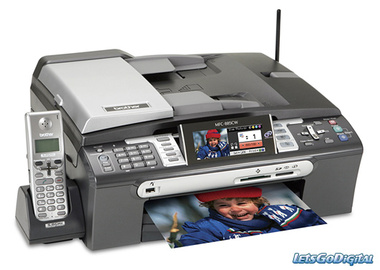
Before you move onto printing, make sure that your inkjet printer is equipped with high quality photo ink, and that your printing on photo paper. Photo paper is good for your print because regular paper tends to absorb the ink instead of showing off color like photo paper does. Your inkjet printer will need high quality photo ink because standard ink isn't designed for photographs. Without these two things, you risk compromising the integrity and beauty of your photograph.
Step 4
The final step you'll need to take before printing on your inkjet printer is to make sure that it's going to print at the highest qualities. This can be done by going into print properties, and making sure that it's set at the highest quality, or on a photo preset that the printer may have provided.
Step 5
After you're inkjet printer is done printing your photo, be sure to let the ink dry completely. The recommended time for this is about an hour. Also, if you happen to be making more then one print, be sure that you don't stack the prints on top of each other before they're finished drying. If the ink isn't quite dry, you risk smearing it, and this can completely destroy your photo.
Tips
1. Use a decent digital camera. By using a digital camera with two to three mega pixels or more, you'll give yourself a good print, and save yourself a lot of hassle.
2. Edit your photos. Edit your photos in Photoshop or another photo editing program to bring out the best in your prints.
3. Use photo paper and ink. By using high quality photo paper and ink, you're allowing your inkjet printer to print the best photo it can.
4. Change the settings. Change the settings on your inkjet printer to the highest quality in order to guarantee a high quality photo print.
5. Let it dry. Once your photo is done printing, be sure to let it dry before you do anything with it, so that the ink doesn't drip or smear.
Comments
Most Recent Articles
-
Tips And Ideas For An All in One Inkjet Printer
Printers are the basic needs of offices, stores, shops and even home computers. Today you can see there are many companies manufacturing printers. There are various different types o...
-
How To Use An Inkjet To Print
Inkjet printers are the most commonly used printers today. Since they were introduced in the 1950s, they have continued to grow both in popularity and their prices have gone down significant...
-
How To Print Great Quality Pictures With An Inkjet Photo Printer
In order to print a quality photo with an inkjet photo printer, it's important to know how to use it.